Microsoft Windows is the most popular operating system on desktop and laptop computers and it has evolved over time. The latest and best version of the operating system, Windows 10 unlike windows 7, is designed to be always connected and always up to date. This has made it more stable and secure. Because of this, however, It is the most data-hungry version of Windows yet. As a result, your internet data usage tends to be on the high side with this Operating system your PC. If you worry about this, the good news is, you can restrain it from going all-out on your home network with a few tricks, read on.
RELATED : How To minimize data usage on your mobile device.
How to Know what is consuming your data
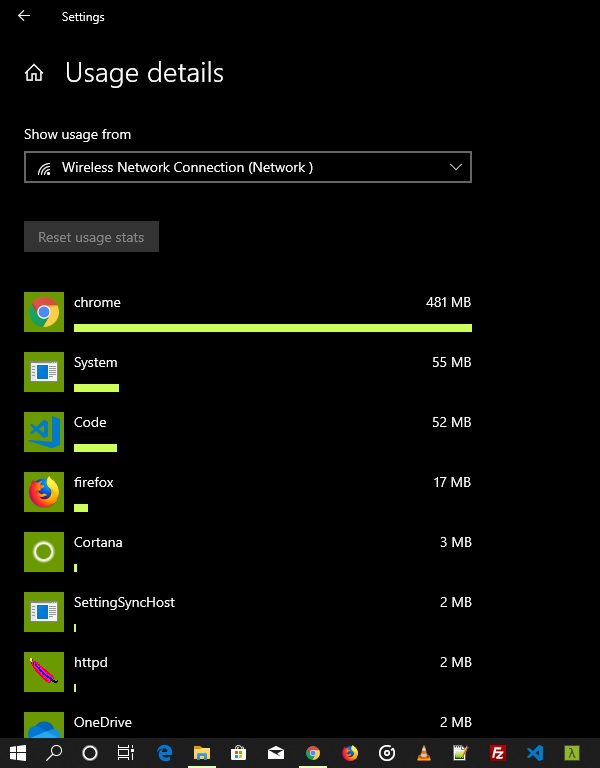
Windows 10 has been so designed to give you a summary of how your pc consumed internet data for the past 30 days, itemizing this based on the app that consumes the most. This summary will help you understand how your PC uses your internet data and which app consumes the most. to check this follow these simple steps:
- Open the Settings app from your Start menu
- Click or tap Network & Internet
- Click or tap Data Usage.
- From here select which network type you want to see the overview and you’ll see a chart showing how much data your Windows 10 PC has used over the last 30 days, broken down between Wi-Fi and wired Ethernet. The list has the app with the highest consumption first
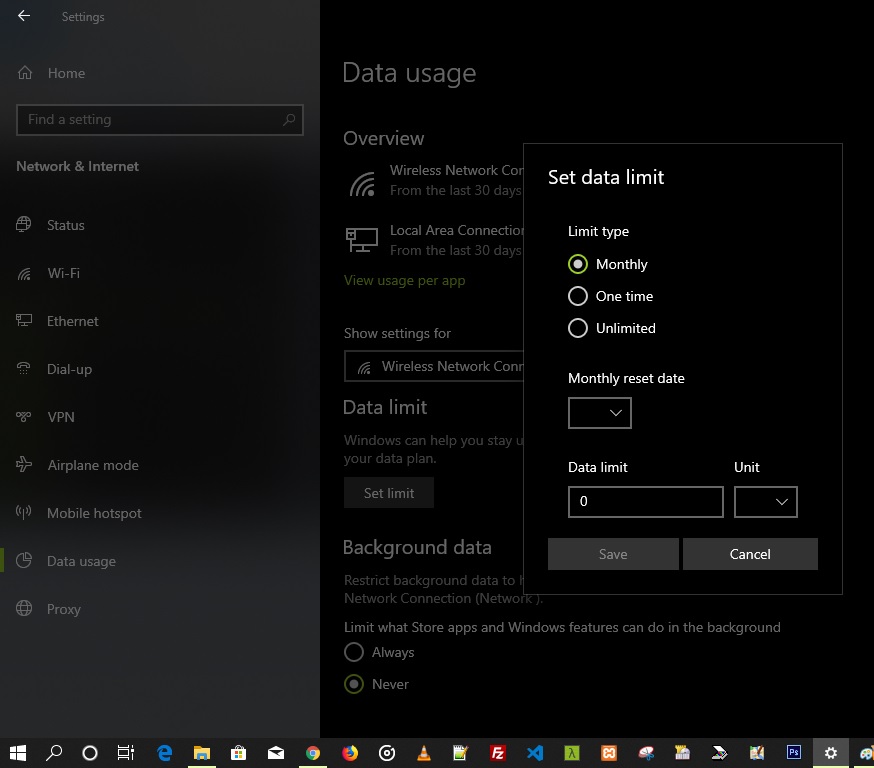
Set Data Limit
From the Data usage window, there is an option for setting a data limit. With this, windows help you stay under the data limit you set, so you don’t use more than you want. This option, may not be available if your windows 10 is not updated. The data limit option has three (3) options: Monthly, One time and Unlimited
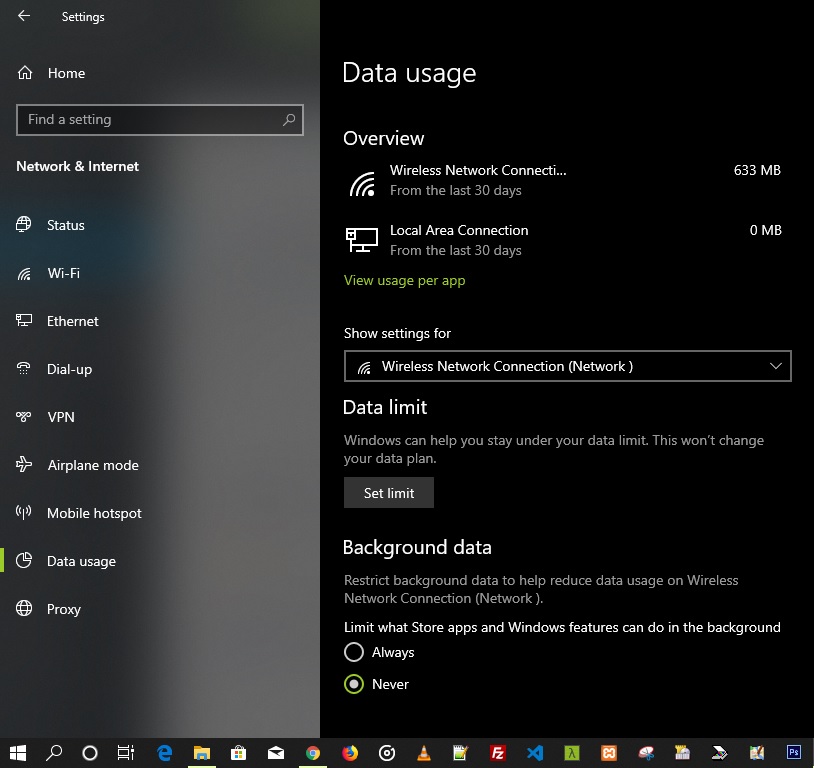
Kill Background Data
From the Data usage window, there is an option for you to restrict background data usage for your connected network. This helps you to limit what store apps and windows features can do in the background. Put it on Never to restrict background data.
How to Restrict Automatic Windows 10 Updates
Windows 10 is designed to automatically download and install updates without your input. Microsoft updates Windows 10 very often, and sometimes, those updates can be fairly large sometimes in their gigabytes.
There are several ways to prevent Windows 10 from automatically downloading updates, depending on the edition of Windows 10 you have. However, one easy and quick way to put a leash on this on any Windows 10 PC is to set your Wi-Fi network as a metered connection. Windows 10 won’t automatically download updates on that connection.
Set Metered Connection
To set your Wi-Fi connection as a metered, follow these simple steps
- Open the Settings from the startup menu,
- Click or tap Network & Internet
- Click or tap Wi-Fi from the options on the left. This should be done when you are already connected to the WI-FI network
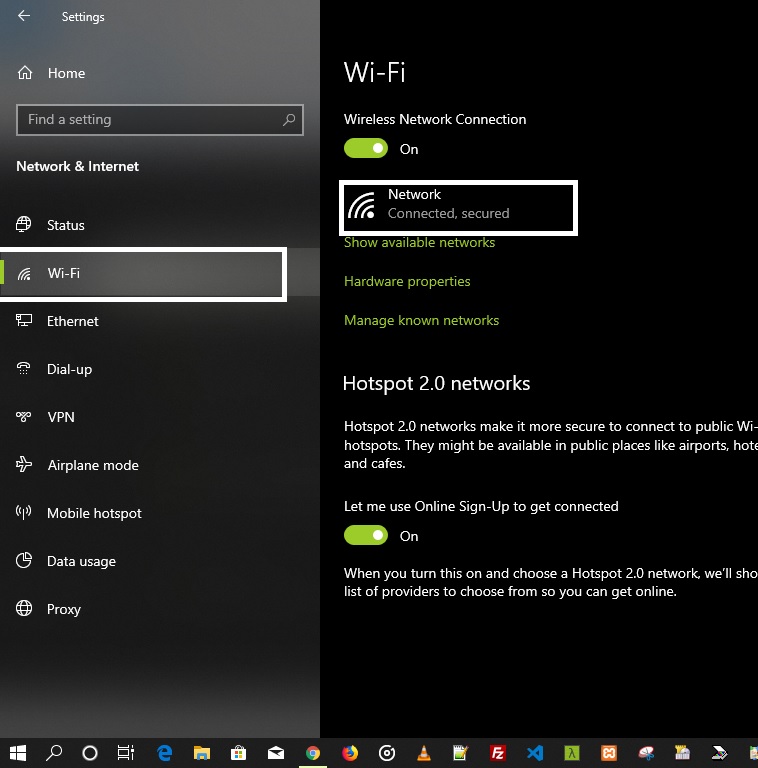
- Click on the network name you are connected to, scroll down and enable the “Set as Metered Connection” option. (For older versions of Windows 10, Scroll down below the list of Wi-Fi networks and select “Advanced Options.” Enable the “Set as Metered Connection” slider here.)
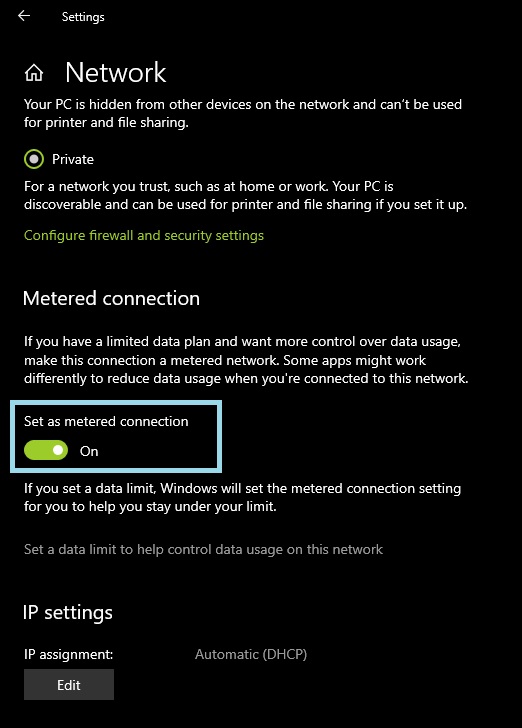
Note that this will only affect the Wi-Fi network you’re currently connected to, so Windows 10 will start automatically downloading updates when you connect to another network. To set another Wi-Fi network as metered, you’ll need to connect to it and change the option again. Windows 10 remembers this option for each Wi-Fi network you enable it for, so it will be automatically set the next time you connect provided you have not changed the WI-FI name.
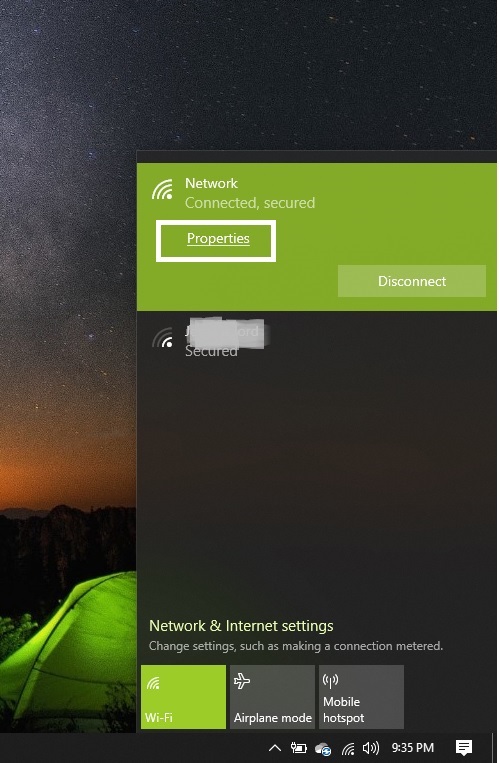
A quick and easier way to go about setting a WI-FI network as a metered connection is through the list of available networks as shown at the bottom right of the taskbar. Not available for the earliest version of windows 10
- Click on the WI-FI connection icon on the task-bar
- Connect to your desired network from the list
- when connected, click on properties. This takes you to the settings for that connection, scroll up and enable set as metered connection.
Once you’ve got Windows 10’s automatic updates–and Background data use–under control by putting your network connection on metered, the Windows operating system should be using very little data on its own. Most of your data use will come from your web browser and the other apps you use. You’ll need to keep an eye on those apps and configure them to use fewer data.
Have you found other methods useful, let us know in the comments below.


[…] that, go to Settings and deactivate the “Update apps automatically“ […]